on
Homelab: Part 1
Let's Encrypt TLS Certificates for LAN
I’ve been wanting to set up a homelab for myself for quite some time. Working at Google, I’ve always felt alienated from what the tech industry is doing. Kubernetes? What is that? All I speak is Borg!
Setting up a homelab thus became a way for me to keep myself up-to-date on the ever evolving technical landscape outside of Google. It also acts as a de-stressor as playing with random tools to build weird solutions is a long-lost hobby of mine (e.g. - starting a car with raspberry pi using transistor switches).
I currently run multiple custom services like pi-hole for DNS and ad-blocking, plex as a media server, custom build of OpenWRT for routing and shaping gigabit plus uplinks, bitwarden for secret management, Wireguard for VPN links between different sites, reverse proxies, docker registeries and the likes.
Introduction
Modern web works on Transport Layer Security (TLS), which is used for securing e-mail, voice, bank-transactions, and virtually every communication on the internet today. HTTPS by default has also made it impossible to run un-encrypted services on the internet without bumping into annoying nag screens.
With the advent of always-on internet devices and the huge attack-surface available to hackers, the same security considerations are also valid for private networks like the local LAN. I do not feel comfortable entering the login password to my router using on an insecure http channel, even on my private LAN. Similarly, I like verifying the authenticity of the server I think I am talking to, ensuring it is actually the real one and not some MiTM proxy.
There are multiple options for securing personal websites and services, the most common one: using self-signed certificates. This is useful and as secure as other methods, but it still gives the annoying nag on modern browsers. Many android and iOS applications also refuse to connect to such services with no way to bypass outside rooting devices.
Let’s Encrypt provides free TLS certificates for websites. But there is a caveat. The widely-used default HTTP-challenge requires the requesting server to prove domain ownership by making the itself accessible over the internet. Doing this for LAN clients will open a bigger security hole than the one I am trying to patch.
Let’s see how we can get Let’s Encrypt to sign certificates for our LAN servers using a personal domain and a custom DNS server. I use a personal domain for stable addressing across all my sites spread across Delhi, Bangalore, DigitalOcean, GCP and to to have fancy email ids for everyone in the family.
Setting up your own DNS Nameserver
Most of my sites receive a dynamic IP from the ISP, which means, in order to have stable addressing for my nodes, I need to configure DDNS (RFC 2136). Let’s Encrypt also only provides wildcard certificates for DNS based challenges, thus requiring API based updates to my domain’s DNS records.
I decided to set up my own DNS server for fine-grained control over how all these components work together.
Updating the domain registrar about your nameservers
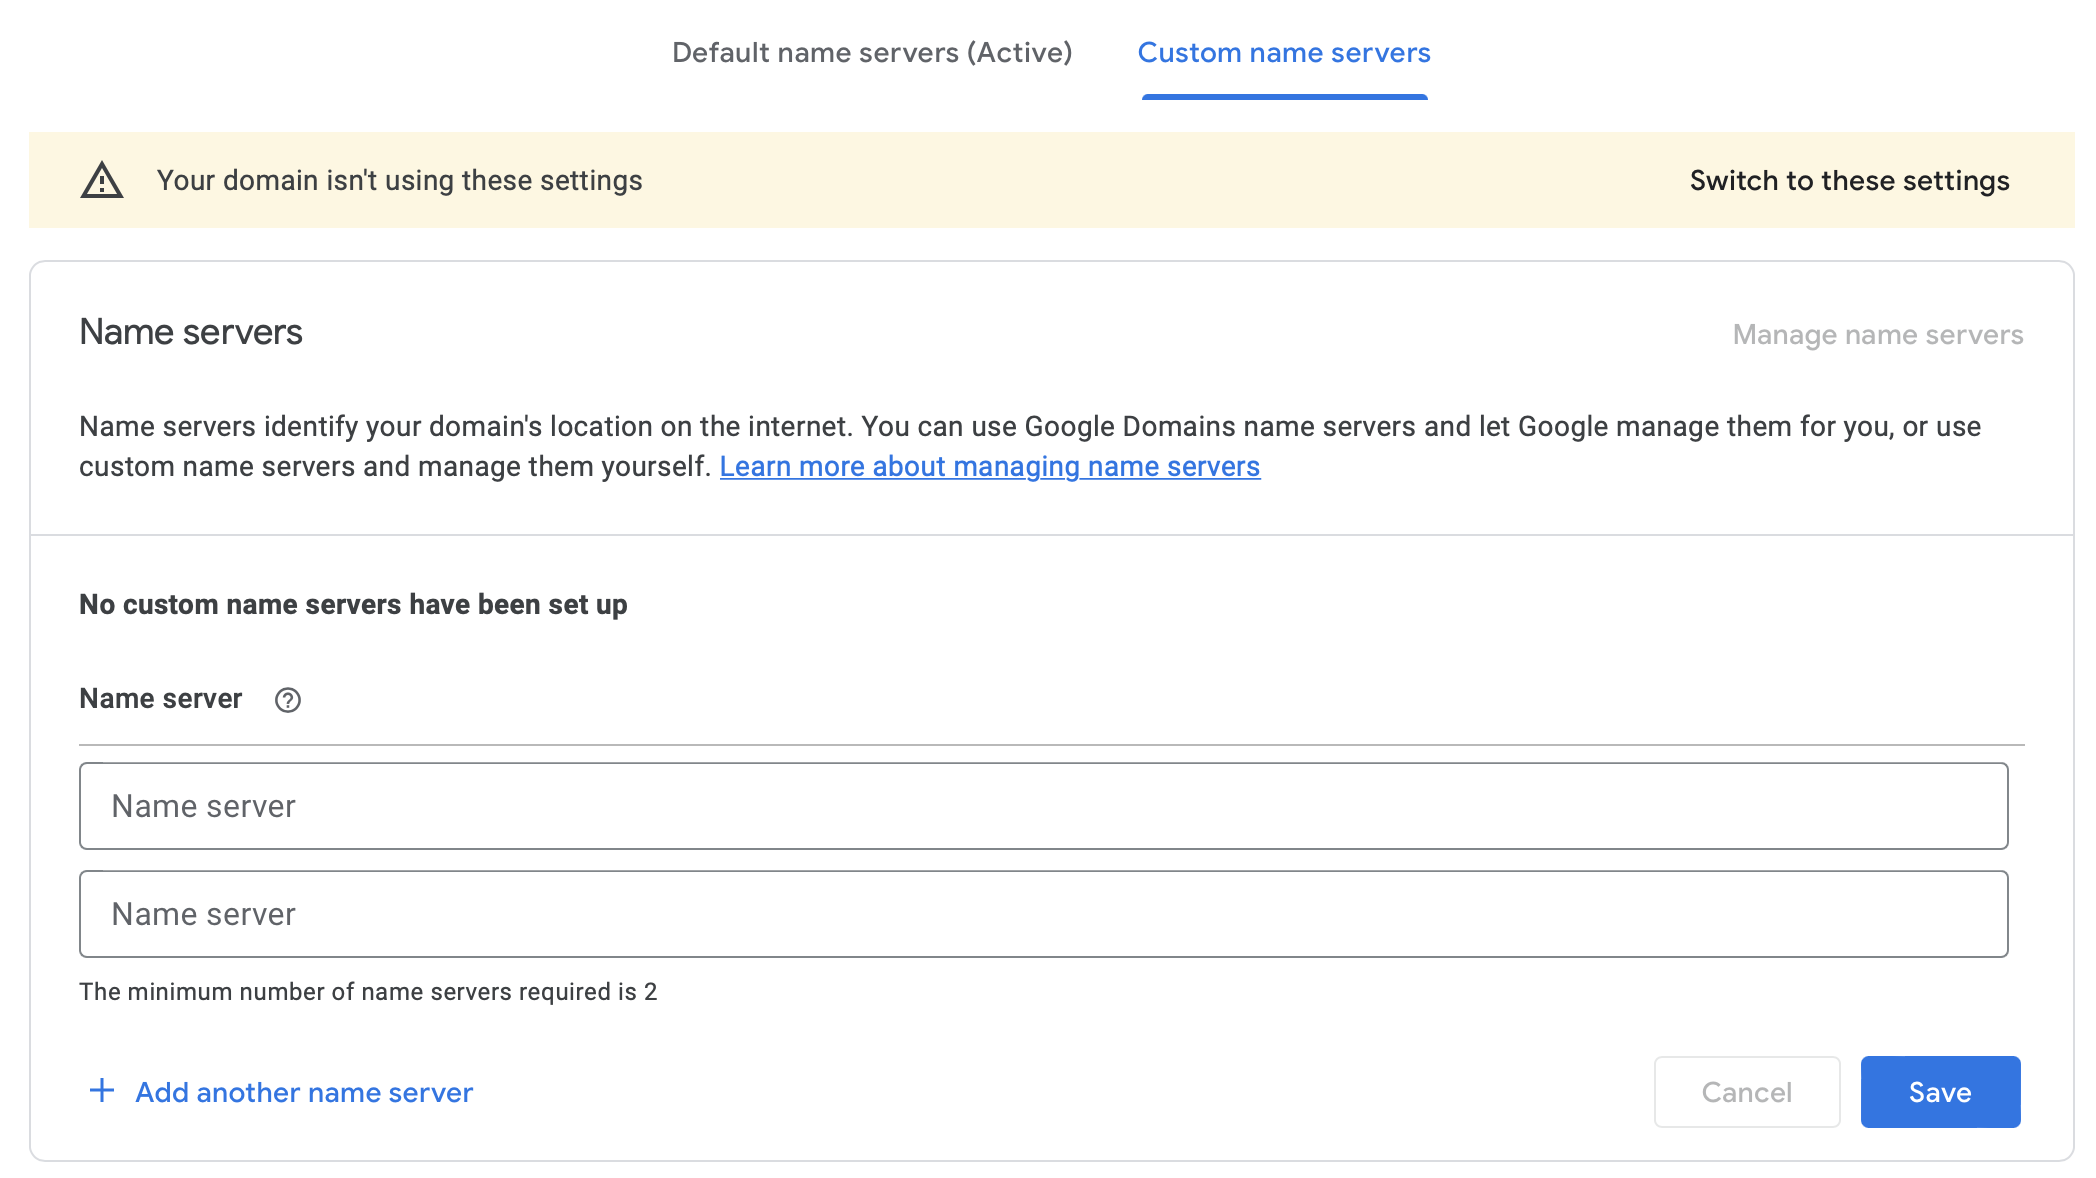
To do this, we need to set a NameServer (NS) record for the domain with the registrar. The NS record indicates which DNS server is authoritative for that domain, and thus contains the actual DNS records and IP addresses.
You can choose to do it for all of example.com. On Google Domains, the setting to do so is available on the DNS page. Note that it requires you to have two nameservers for redundancy.
I only do it for my local sub-domain, in order to have higher resiliency for my public websites. You can do this by adding an NS record only for the subdomain.
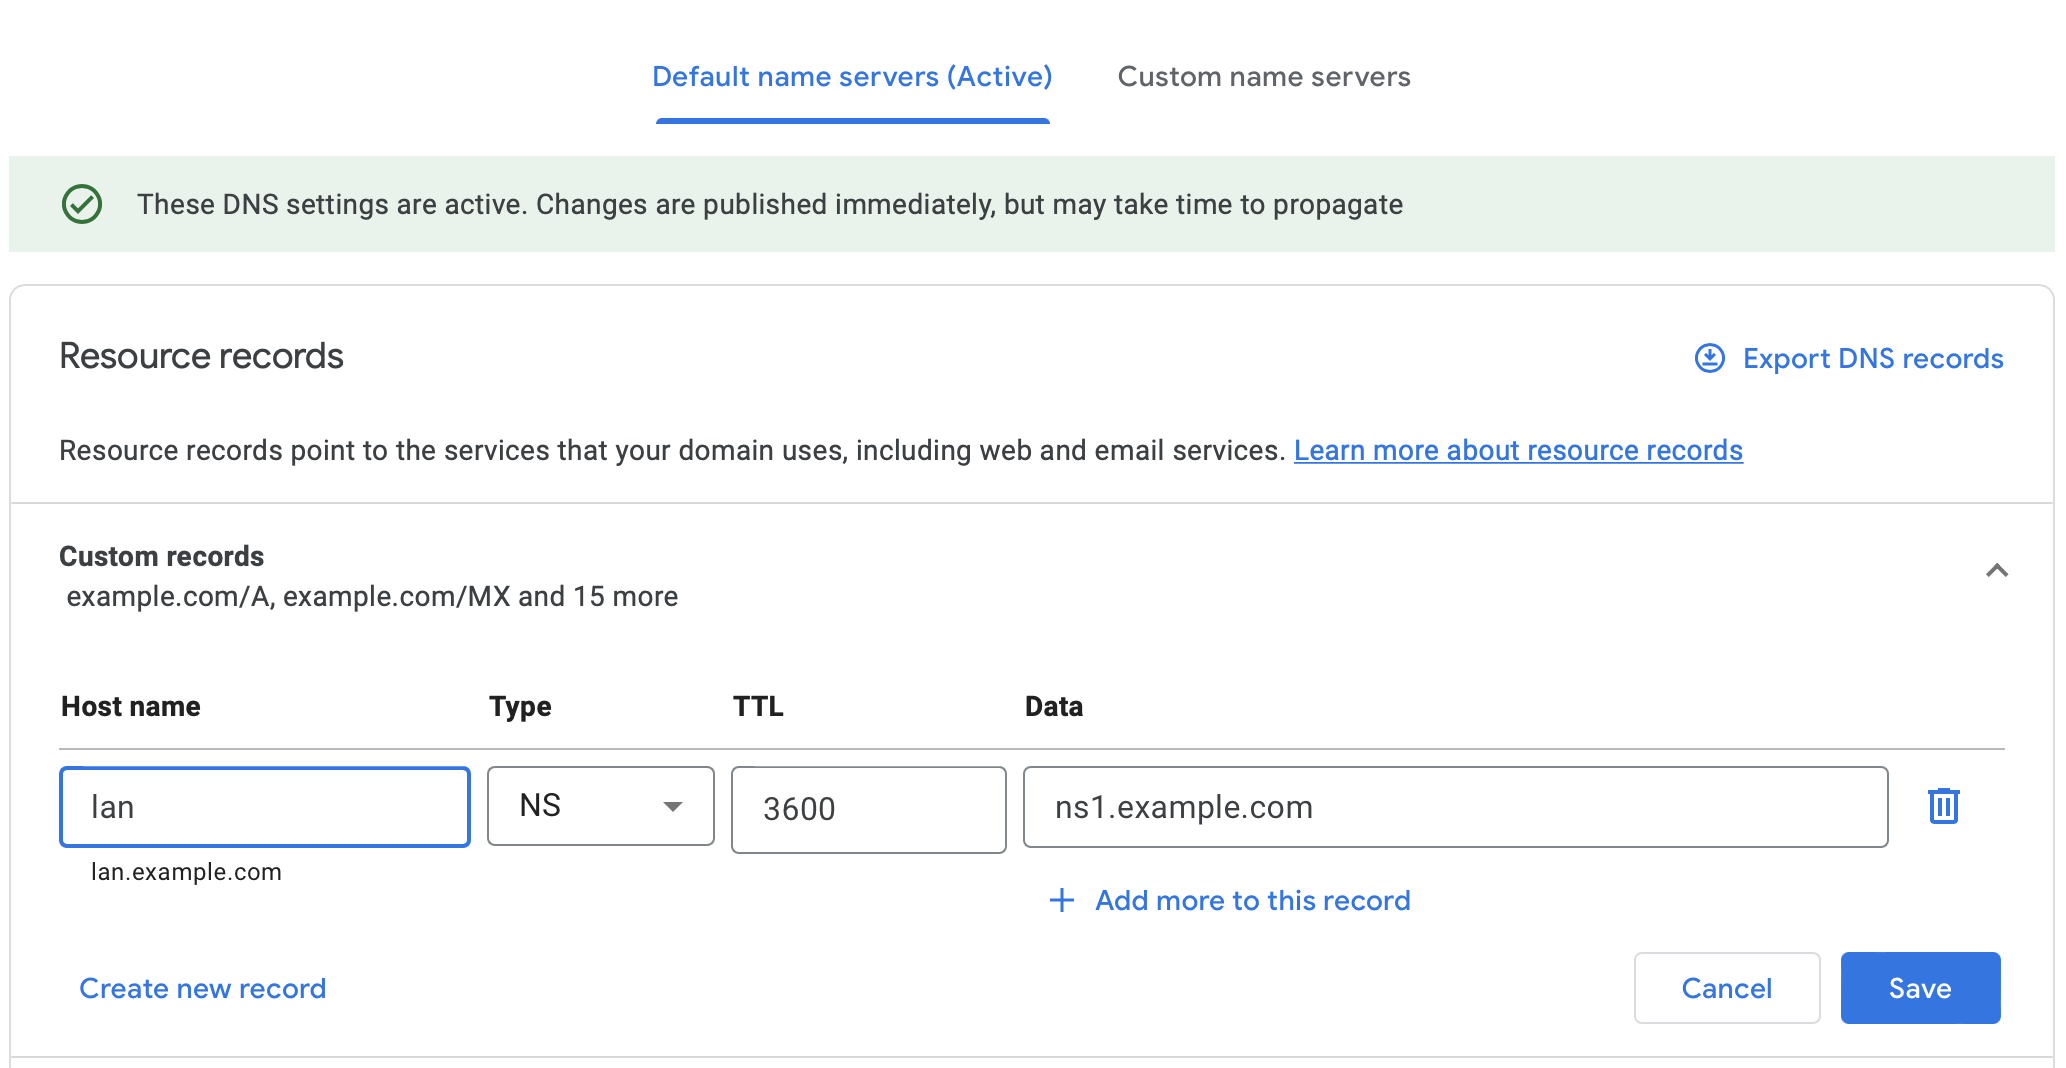
ns1.example.com could be a dynamically updated domain but for higher resiliency, I host it on a server with static ip on DigitalOcean.

Installing BIND 9
BIND is a full-fledged and super powerful DNS system. We will install it on the system that hosts our nameserver. I use Docker Compose to deploy it.
code/src/example.com $ tree
.
├── bind
│   ├── Dockerfile
│   ├── db.example.com
│   ├── named.conf
│   ├── named.conf.certbot
│   └── named.conf.options
└── docker-compose.yml
The Dockerfile is pretty vanilla. We just use the default bind9 installation and add our config files to it.
bind/Dockerfile
FROM ubuntu/bind9:latest

COPY --chmod=644 --chown=root:bind ./named.conf /etc/bind/
COPY --chmod=644 --chown=root:bind ./named.conf.certbot /etc/bind/
COPY --chmod=644 --chown=root:bind ./named.conf.options /etc/bind/
COPY --chmod=644 --chown=root:bind ./db.example.com /var/lib/bind/
Keeping a separate configuration for certbot for future extensibility.
bind/named.conf
include "/etc/bind/named.conf.certbot";
We need to allow certbot (the program that creates letsencrypt certificates for us) access to create and update the TXT records for our subdomain using RFC 2136.
In order to do so, we first create a secret for the client to use.
code/src/example.com/bind $ docker build . -t bind
code/src/example.com/bind $ docker run bind rndc-confgen -A hmac-sha512 -k certbot.
key "certbot." {
  algorithm hmac-sha512;
  secret "<your secret key goes here>"
};
Copy the key section to named.conf.certbot. You can choose to only allow updates via a particular interface (Wireguard, localhost, local-subnet for more security).
bind/named.conf.certbot
key "certbot." {
  algorithm hmac-sha512;
  secret "<your secret key goes here>"
};
zone "lan.example.com" {
  type master;
  file "/var/lib/bind/lan.example.com";
  allow-query { any; };
  update-policy {
    grant certbot. subdomain lan.example.com. txt;
  };
};

# Use the following to only allow updates fron localhost
# controls {
#  	inet 127.0.0.1 port 953 allow { 127.0.0.1; } keys { "certbot."; };
#};
bind/named.conf.options
options {
  directory "/var/cache/bind";
  dnssec-validation auto;
  listen-on { any; };
  listen-on-v6 { any; };
};
bind/db.example.com
$ORIGIN lan.example.com.
$TTL 300
@               IN      SOA     ns1.example.com. email_id.example.com. (
                                2020050806 ; serial
                                10800      ; refresh (3 hours)
                                3600       ; retry (1 hour)
                                604800     ; expire (1 week)
                                86400      ; minimum (1 day)
                                )
                IN      NS      ns1.example.com.
                IN      TXT     127.0.0.1
docker-compose.yml
version: '3.7'

services:
  bind:
    build: ./bind
    restart: unless-stopped
    ports:
      - 53:53/udp
      - 53:53/tcp
    environment:
      - BIND_USER=bind
      - TZ=UTC
    working_dir: "/var/cache/bind"
    volumes:
      - bind_cache:/var/cache/bind

volumes:
  bind_cache:
Finally, turn it all up using Docker Compose:
code/src/example.com $ DOCKER_BUILDKIT=1 docker-compose up -d --build
Note that DOCKER_BUILDKIT=1 is required for the chmod flags in order to set the right permissions to not run bind as root.
Does it work?
Test if your nameservers are set correctly.
First, we see if our nameserver is responding to our queries.
code/src/example.com $ dig @ns1.example.com lan.example.com SOA

; <<>> DiG 9.10.6 <<>> @ns1.example.com lan.example.com SOA
; (1 server found)
;; global options: +cmd
;; Got answer:
;; ->>HEADER<<- opcode: QUERY, status: NOERROR, id: 54064
;; flags: qr aa rd; QUERY: 1, ANSWER: 1, AUTHORITY: 0, ADDITIONAL: 1
;; WARNING: recursion requested but not available

;; OPT PSEUDOSECTION:
; EDNS: version: 0, flags:; udp: 1232
; OPT=15: 00 12 ("..")
;; QUESTION SECTION:
;lan.example.com.			IN	SOA

;; ANSWER SECTION:
lan.example.com.		300	IN	SOA	lan.example.com. 2020050832 10800 3600 604800 86400

;; Query time: 264 msec
;; SERVER: 1.2.3.4#53(1.2.3.4)
;; WHEN: Wed Aug 31 23:56:56 IST 2022
;; MSG SIZE  rcvd: 91
Second, we test that this is also accessible over the global internet via the public DNS servers.
code/src/example.com $ dig @8.8.8.8 lan.example.com TXT

; <<>> DiG 9.10.6 <<>> @8.8.8.8 lan.example.com TXT
; (1 server found)
;; global options: +cmd
;; Got answer:
;; ->>HEADER<<- opcode: QUERY, status: NOERROR, id: 41061
;; flags: qr rd ra; QUERY: 1, ANSWER: 1, AUTHORITY: 0, ADDITIONAL: 1

;; OPT PSEUDOSECTION:
; EDNS: version: 0, flags:; udp: 512
;; QUESTION SECTION:
;lan.example.com.			IN	TXT

;; ANSWER SECTION:
lan.example.com.		60	IN	TXT	"127.0.0.1"

;; Query time: 899 msec
;; SERVER: 8.8.8.8#53(8.8.8.8)
;; WHEN: Thu Sep 01 00:00:45 IST 2022
;; MSG SIZE  rcvd: 64
If these two queries work, voila, we just set up our own nameserver.
Setting up Certbot
We can use any certbot installation anywhere on our local private network, as long as it supports DNS challenges and this server can send traffic to our DNS server. Showing a sample configuration I have along with my personal bitwarden server.
code/src/lan/bitwarden $ tree
.
├── docker-compose.yaml
├── lan_certs
│   ├── Dockerfile
│   ├── cli.ini
│   └── creds.ini
└── nginx
    ├── ...
    ...
We need to use the certbot installation which comes with RFC 2136 challenge plugin.
Setting the XDG_CONFIG_HOME environment variable allows us to copy the cli.ini and creds.ini file during build, while keeping the working directory as a persisted named volume shared with other services like nginx.
Dockerfile
FROM certbot/dns-rfc2136
ENV XDG_CONFIG_HOME=/etc/config/
COPY --chmod=400 ./cli.ini /etc/config/letsencrypt/
COPY --chmod=400 ./creds.ini /etc/config/letsencrypt/
WORKDIR /etc/letsencrypt
# Reset entrypoint as it does not allow us to run commands nicely
ENTRYPOINT []
cli.ini
key-type = ecdsa
email = akshay@jaggi.co
text = True
dns-rfc2136-credentials=/etc/config/letsencrypt/creds.ini
dns-rfc2136 = True
noninteractive = True
agree-tos = True
no-eff-email = True
creds.ini
# Target DNS server (IPv4 or IPv6 address, not a hostname)
# This can be the public static IP, or a static Wireguard/LAN
# IP if RFC2136 updates are only available on the private subnet
# Replace with the IP of the bind instance we set up before
dns_rfc2136_server = 1.2.3.4
# Target DNS port
dns_rfc2136_port = 53
# TSIG key name
dns_rfc2136_name = certbot.
# TSIG key secret
dns_rfc2136_secret = <your secret key goes here>
# TSIG key algorithm
dns_rfc2136_algorithm = HMAC-SHA512
docker-compose.yml
version: '3.7'

services:
  lan_certs:
    restart: always
    build: ./lan_certs
    command: "/bin/sh -c 'trap exit TERM; while :; do certbot renew; sleep 12h & wait $${!}; done;'"
    volumes:
      - Certs:/etc/letsencrypt
volumes:
  Certs:
Finally, run the following command to get your certificate.
code/src/lan/bitwarden $ DOCKER_BUILDKIT=1 docker-compose
code/src/lan/bitwarden $ docker-compose run lan_certs certbot certonly --cert-name="bitwarden" -d "*.bitwarden.lan.example.com"
Creating bitwarden_lan_certs_run ... done
Saving debug log to /var/log/letsencrypt/letsencrypt.log
Requesting a certificate for *.bitwarden.lan.example.com
Waiting 60 seconds for DNS changes to propagate

Successfully received certificate.
Certificate is saved at: /etc/letsencrypt/live/test4/fullchain.pem
Key is saved at:         /etc/letsencrypt/live/test4/privkey.pem
This certificate expires on 2022-11-29.
These files will be updated when the certificate renews.

NEXT STEPS:
- The certificate will need to be renewed before it expires. Certbot can automatically renew the certificate in the background, but you may need to take steps to enable that functionality. See https://certbot.org/renewal-setup for instructions.

- - - - - - - - - - - - - - - - - - - - - - - - - - - - - - - - - - - - - - - -
If you like Certbot, please consider supporting our work by:
 * Donating to ISRG / Let's Encrypt:   https://letsencrypt.org/donate
 * Donating to EFF:                    https://eff.org/donate-le
- - - - - - - - - - - - - - - - - - - - - - - - - - - - - - - - - - - - - - - -
This only needs to be run for the first time. The certificate and its configuration will then be persisted in the named volume. The container checks for expiry every 12 hour and will automatically renew the certificate close to its expiry date. The following command starts the container.
code/src/lan/bitwarden $ docker-compose up -d